Turn Your Trampoline Into a Pro Wrestling Ring: [4 Steps]
I was always a fan of WWE, even after I got to know the matches are rigged, and all of the characters are performers and not real wrestlers.
There is something about the moves that kept me on my toes, such as Stone Cold’s ‘Stunner,’ The Rock’s ‘Rock Bottom,’ Undertaker’s famous Piledriver, and Kane’s ‘Chokeslam.’
I loved seeing these moves performed in the ring. Even I tried to pull some of them with my siblings and cousins when I was a kid. We often took it too far and got hurt, followed by a long scolding session from our parents.
Coming back to the point, my kids are also huge fans of wrestling. The only difference is we used to follow the OG’s, but they are more into John Cena, Roman Reigns, and some wrestlers I don’t even know the name of.
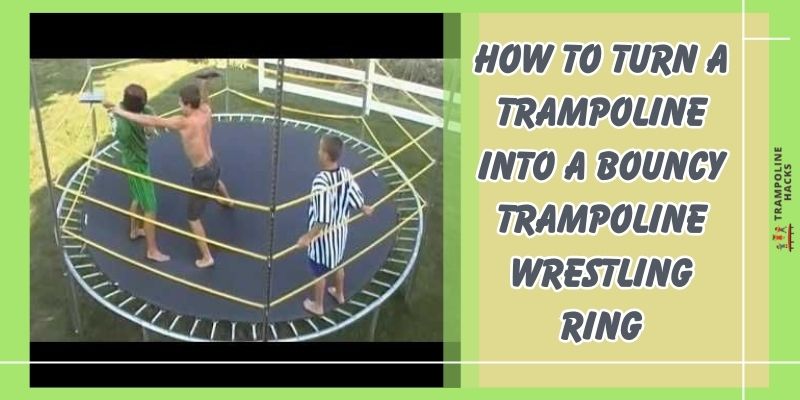
Seeing their passion for wrestling, I decided to make my kids and their friends something they could use to wrestle without injuring themselves. This was when I came up with the idea to make a trampoline wrestling ring.
Check: Upper bounce vs skywalker
In this comprehensive guide, I’ll walk you through all the steps and tips on how to turn a trampoline into a wrestling ring that will provide countless hours of fun and entertainment.
Whether you’re a professional wrestler or just a fan looking to add some excitement to your backyard, this DIY project is sure to bring out the champ in you and your kids.
Step by step guide to Turn Trampoline Into a Wrestling Ring
Here is the 4 steps guide on how to turn your trampoline into a wrestling ring.
Step 1: Selecting the Right Trampoline
The first and most crucial step in creating your trampoline wrestling ring is selecting the right trampoline for the job. As mentioned earlier, square trampolines are the preferred choice due to their ample surface area and even bounce distribution, making them ideal for wrestling.
Look for trampolines that are durable, have strong frames, and come with safety enclosures to minimize the risk of accidents during intense wrestling matches.
You should also consider whether you want to set the ring outdoors or indoors. If the latter is your plan, then you should opt for an indoor trampoline.
Whether you choose a square trampoline, a gymnastics trampoline, an indoor model, or a massive 20 ft trampoline, make sure it suits your available space and budget.
Step 2: Clear the Area and Prepare the Site
Before you start assembling your wrestling ring, clear the area around the trampoline to create a safe wrestling environment. Remove any potential hazards, sharp objects, or debris that could cause injuries during the matches.
Ensure you have ample space around the trampoline for wrestlers to move freely and perform their signature moves without obstructions.
If you plan on setting up the trampoline indoors, choose a spacious room with enough clearance to accommodate both the trampoline and the wrestlers. Additionally, make sure the flooring is suitable for the trampoline’s legs and provides a stable base for the wrestling ring.
Step 3: Bring Your Toolbox
Gather the necessary tools and equipment for the job. The quantity and length of these materials may depend on your trampoline’s size, so measure it before proceeding. Here’s what you’ll need:
- Non-stretchy ropes, plastic fasteners, and shoelaces for secure fastening.
- Hooks with screws and wooden poles (or PVC pipes) for building the structure.
- A large piece of cloth.
- A staple gun for the cloth.
- Several pads or pillows for added safety and protection.
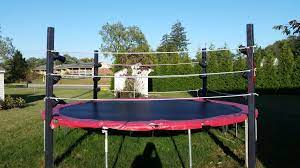
Step 4: Change Your Trampoline into a Wrestling Ring
The two steps mentioned above are more of a prerequisite than the actual assembly process. This is where you learn how to transform your trampoline into a wrestling ring.
Trampoline Setup
The trampoline is the foundation of your wrestling ring, so you need to follow the manufacturer’s instructions closely to ensure everything works as it should. Different trampoline models may have specific guidelines, so safety and performance are a must. For the best results, go with a round trampoline, as it provides a more even surface for wrestling moves.
Prepare and Place the Pole Corner Areas
To make your trampoline wrestling ring strong, find the spots for the wooden poles. Mark four points around the trampoline, forming a square shape to identify the corners. Dig four holes, each one going 1 foot deep, at these marked spots. This will create a solid base for our supporting poles, keeping the whole setup steady and balanced.
The wooden poles are the backbone of a trampoline wrestling ring structure. Insert them into the holes we dug, making sure they stand at least 4 feet tall, with around 3 to 4 feet buried firmly in the ground. This depth will prevent any wobbling or accidents during intense wrestling matches, ensuring everyone’s safety.
Fasten the Pipes
If you’re using PVC pipes instead of wooden poles, secure them just as well. Next, use plastic fasteners to make sure the PVC pipes are firmly attached to the ground. Each pipe needs about 4 to 5 fasteners to distribute the weight evenly and avoid any wiggling. Safety first, even with PVC!
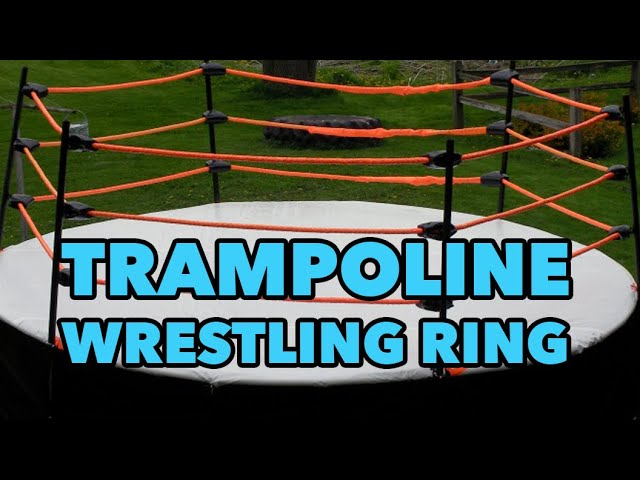
Drill Holes for the Ropes
The wrestling ring needs ropes to set the boundaries and support the wrestlers during their moves. So, carefully measure and mark three points on each side for the turnbuckles. Drilling holes of the same size and depth at these marked points will keep the ropes level and properly tightened.
Check Does a trampoline make you taller
Secure the Hooks
To keep those ropes in place, you’ll need to securely attach hooks or bolts. If you’re using bolts, add washers on both sides for extra strength. The ‘S’ rings and circular rings will further secure the ropes, making sure everyone can handle all the action in the ring.
Tie the Ropes
Safety is a big deal in wrestling, so you’ll have to tie those ropes super tight and stretch across the entire ring. This will form a stable boundary for the wrestlers. Pay close attention to make sure the ropes are even and tight, keeping the playing surface safe and even for everyone.
Add the Pads
Ensure the wrestlers’ safety by adding padded cushions or pillows to the turnbuckles. Use shoelaces to securely attach the pads in place. This thoughtful addition provides a soft-landing spot for daring moves and reduces the risk of injuries during intense wrestling matches.
Staple the Cloth
Now, give your wrestling ring that pro look! Cover the trampoline’s underside by stapling a large cloth piece to the wooden poles. This will give your ring that authentic WWE-style appearance, adding some flair to the action.
Test the Ring
Safety is your top priority, so put your ring to the test before the real wrestling begins. Spend at least 10 minutes checking everything thoroughly, making sure there are no loose parts or potential issues. If all looks good after the test, you’re ready for some exciting wrestling action!
Design the Wrestling Ring Area
Now comes the fun part – designing the wrestling ring area! Consider adding ropes around the trampoline’s edges to make the wrestling experience more authentic and exciting.
You can use sturdy, flexible materials like pool noodles or soft ropes to create the wrestling ring’s boundary.
Attach the ropes securely to the trampoline’s frame, ensuring they are at a suitable height for wrestlers to interact with. The ropes will not only enhance the visual appeal but also serve as a helpful guide for performers during the matches.
Establish Safety Rules and Guidelines
Before diving into the world of trampoline wrestling rings, establish clear safety rules and guidelines for all participants. Communicate about these rules effectively to ensure everyone understands the potential risks and how to prevent accidents during matches.
As you might be dealing with kids, you need to be extra careful about the safety guidelines.
Some essential safety guidelines may include:
- No dangerous or reckless moves that could cause harm to oneself or others.
- No throwing or slamming opponents off the trampoline.
- No jumping from the trampoline to the surrounding area.
- Wrestlers should wear appropriate protective gear, such as knee pads and elbow pads.
Remember, safety is of the utmost importance, and sticking to these rules will ensure everyone has a great time without compromising their safety.
Organize Wrestling Matches
Now that your trampoline wrestling ring is ready to roll, it’s time to organize some thrilling matches! Invite friends, family, or fellow wrestling enthusiasts to participate and showcase their skills in this unique setting.
Consider hosting tournaments, tag-team events, or even royal rumble-style matches for added excitement.
You can also record the matches and share them online to entertain a broader audience. Who knows, your trampoline wrestling ring might become a viral sensation!
Who Will Be the World Heavyweight Champion?
O, My God! It’s a ‘Spear’ out of the Blue!
It’s the line that used to make me hop out of the chair. I don’t know if you heard about the ‘Spear,’ the infamous finisher used by Edge and Goldberg, but it looked so fantastic.
We all have fantasized about wrestling at one time or another. Some of us actually got to experience the thrill, whereas others weren’t lucky enough.
If you have a trampoline lying around in your backyard, you can turn your fantasy into a reality. It’s not very difficult to make your own DIY trampoline wrestling ring. With proper instructions, anyone can do it within a few hours.
Now that you know how to turn a trampoline into a wrestling ring, why not give it a try? See how much your kids or their friends love it. Good Luck!
Hi, It’s Jason and Louise here and welcome to our website. We are parents to Hannah and Zachary who absolutely love the outdoors and are actually addicted to jumping on their trampoline. Our amazing little family lives on a beautiful 20-hectare rural property with Horses, Dogs, Cats, Chooks, a Rooster, Cats and also a Pet Kangaroo.