How To Put A Trampoline Together? Baby Steps!
One of the biggest challenges for homeowners who purchased a trampoline recently is putting it together for the first time. Now a trampoline is a big investment already, and if you picked a halfway decent outdoor model that’s 10 feet or more, there’s a good chance that you already spent quite a lot on it.
So having to hire an expert to do the setup for you might not be very appealing. Well, if you’re like me – you’ll take this as a learning opportunity. Back when I was a kid, I helped out my dad when he got our first trampoline. And even after that, I had a tough time setting up my backyard trampoline when I grew up and had my own place.

So don’t worry – it’s normal to feel intimidated. And it can be difficult to manage on your own. But as long as you take your time and don’t try to rush through it, you can get it done within one or two hours. I would recommend getting a second set of hands to help you out, though, as it will make things much easier.
Check How To Move Trampoline Without Taking It Apart
In this article, I will talk about how to assemble a trampoline and break down the process into small digestible bits to make it as easy as possible for you. So, let’s get started.
Getting Everything Set Up
What if I told you the most important part of setting up a trampoline is not the assembly but rather the buildup leading up to it? As surprising as it may sound – getting everything set up before you assemble the trampoline is where most people mess up.
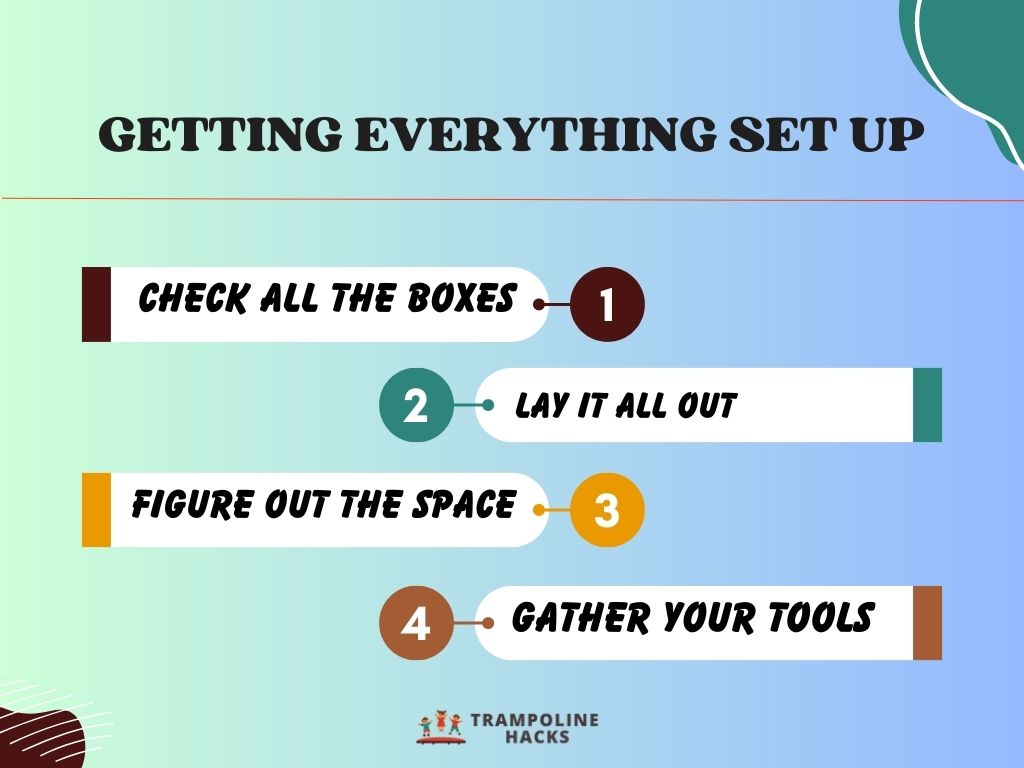
So, before you start putting everything together, I recommend laying it all out in front of you so that you can check for all the parts. You also need to gather a set of tools to help you put together the trampoline.
Since it’s such an important step, I figured it best to give you a quick rundown of the best practices when you’re starting out with the assembly.
Check how to disassemble a trampoline
Check all the Boxes
Trampolines usually ship in multiple boxes. How many boxes you get and how big the boxes are mostly depends on the size of your trampoline. For instance, the parts for a typical 14 feet trampoline usually come in three to five boxes, whereas, for 8 feet, you’ll only get two to three boxes.
The first thing you should do is empty out the contents of your trampoline box and pick up your instruction manual. In the manual, go to the page marked as the Parts List or something similar and check to see if you have all the parts listed in the manual.
That way, if there’s a missing part, you can contact the seller right away and ask for the missing piece. Usually, they will ship the part to you as soon as possible, and then you can move on to the next step.
Lay it all Out
Once you get your trampoline parts out of the box and make sure all the parts are there – I would recommend laying it all out in an organized way. Most people just leave it in a pile and frankly, that makes things unnecessarily complicated. You’ll have a much easier time figuring out what goes where if everything’s organized.
Check Are trampolines save for adults
Besides, having everything right in front of you in a systematic way can help you plan the overall assembly process. You’ll be able to decide which sections to work on easier and can use your manual as a reference for what comes when. So even though it might sound unnecessary, take a moment to organize all the pieces.
Figure out the Space
Some people don’t worry about the space requirements for a trampoline before they actually get started with the setup process. You’ve already done the math when you were wondering what size of trampoline you needed – why go through the same hassle again?
But if you ask me, that’s the wrong way to go about it.
Having a proper measurement of where you want to put the trampoline will let you plan the entire process a lot easier. So, you should take this moment to figure out where you want to put your trampoline.
Ideally, you want to place your trampoline on a soft surface that’s firm enough to hold its weight. Putting your trampoline on concrete roads is a bad idea, for instance. If you have a modest backyard with lots of grass, that would be the perfect place to set up your new trampoline.
Gather Your Tools
Remember how I said you need a couple of tools to set up your trampoline? Well, once you have figured out where you want to place the trampoline, now’s the time to assemble your supplies.
Now setting up a trampoline doesn’t require too many tools or at least none that you already shouldn’t have in your house. If you have a compact power drill at your home, you’re all set. Of course, you’d need a rubber mallet and a spring puller, but those usually come with the trampoline.
I would also recommend wearing a pair of safety gloves as you assemble your trampoline to prevent your hands from getting caught between the springs.
How to Install a Trampoline?
With the prep work finished you’ll notice that installing you’ll trampoline is much easier now. Don’t get me wrong – it’s still a fair bit of work and assembling a trampoline can take a long time.
But if you have a bit of patience and a friend helping you out, you should be able to get things done within a couple of hours.
The entire assembly process for a trampoline can be broken down into three separate sections –
And since each step involves a lot of work and is essential before you can put everything together – I’ll address them individually. All you need to do is follow along with me. For this guide, I’ll assume you have a round trampoline as that is the most common shape for homeowners. Other shapes are not that different.
Disclaimer: Before you start, make sure you read the instruction manual thoroughly. I will talk about the basic assembly process – but some high-end trampolines have their own special assembly steps. And going through the manual should tell you all you need to know about those extra steps.
Assembling the Trampoline Frame
Whenever I am setting up a new trampoline, I like to start off with the frame. Assembling the frame first gives you a solid foundation to finish the rest of the installation process. And it’s also the part that usually takes the most time.
Here are the steps to assembling a trampoline frame –
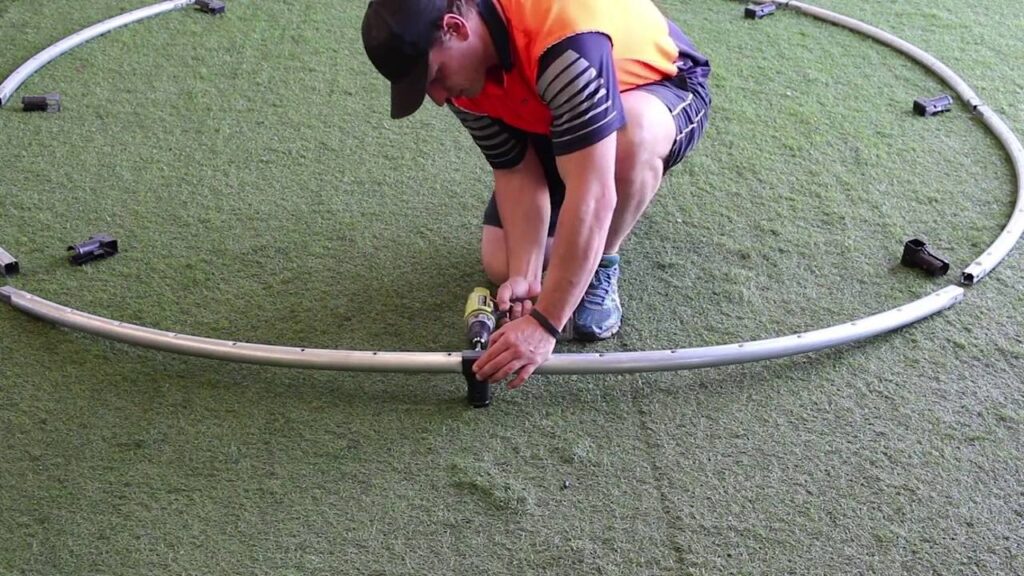
Step – 1
Start with putting together the edge pieces first. Lay out the circular frame pieces of the trampoline on the ground to get an idea of how big it is. Then start snapping the parts together until you have a complete ring. Once attached, you can keep it on the ground and move on to the next step.
Step – 2
For the next step, you’ll be assembling the leg pieces. If you inspect the finished ring, you’ll find small holes in it. You need to attach the legs to these spots. Line up one of the trampoline legs to the location and gently hammer it in using the included rubber mallet.
Don’t hammer too hard, or you might damage the leg. During this step, I usually put a soft towel between the leg and the hammer to soften up the hit. Repeat this step until all the legs are in place.
Step – 3
Once the legs are installed, it’s time to secure the frame using the included screws and bolts. Your trampoline should already come with pre-drilled holes for the screws, and you can use an appropriately-sized Philips head screwdriver to screw it in.
Of course, using a power drill will ensure the process goes faster. There are quite a few screws to go through, and you need to make sure each of them is fastened securely before you move on to the next step.
Step – 4
Now that the frame is pretty much set up, it’s time to flip it over and put it in its upright position. Having a partner helping you out can make things easy. Even a small 10 feet trampoline can be pretty heavy. With some help, you should be able to flip it over and put it on its legs.
Try rocking the trampoline to see if there are any wobbles. If you find any, that means the legs are secure. You need to find the leg that’s responsible for the wobble and reinstall it. But if everything feels stable, you can move on to installing the trampoline mat.
Setting up the Mat
Setting up the trampoline mat takes a fair bit of work and can be pretty dangerous if you don’t have a partner. So even if you manage to assemble the frame on your own, I would strongly recommend finding someone to help you with this next step.
Here are the steps to setting up the jumping mat in your trampoline –
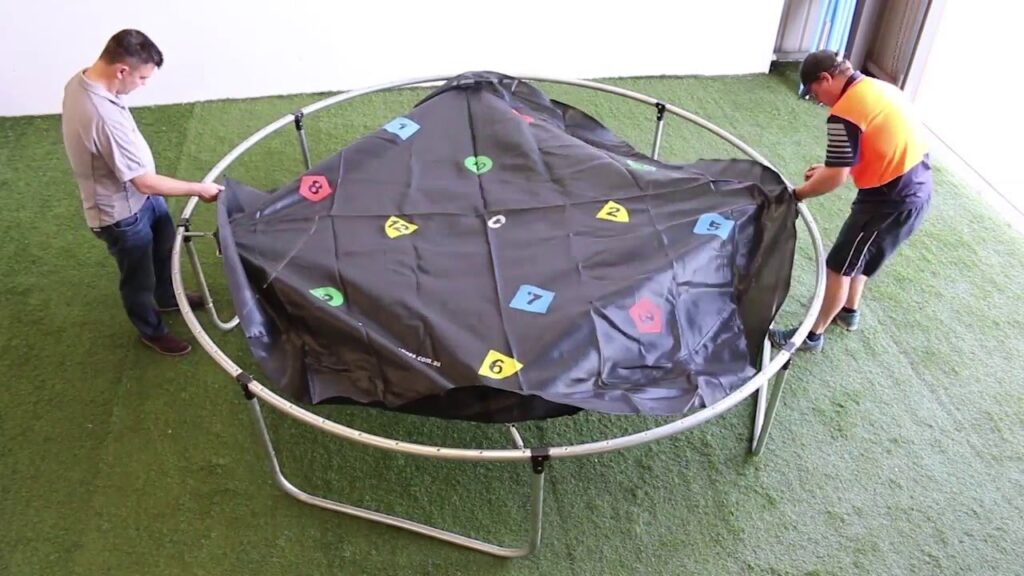
Step – 1
Start with setting up the springs. The number of springs on your trampoline again depends on its size. But usually, it’s an even number.
If there are two of you working on the assembly, grab an even number of springs each and go to the opposite sides of the trampoline. Then count the hooks opposite to each other as you install the springs in their slots. That way, you’ll have an easier time aligning the mat.
There are designated hooks for each of the metal strings. And once you are about halfway done, you’ll notice that it’s harder to stretch the springs. Don’t worry – that’s normal.
At this point, you should bring out the hook puller and use it to stretch the springs as you put them on their hooks. You might also need to pound the hooks into place in some instances.
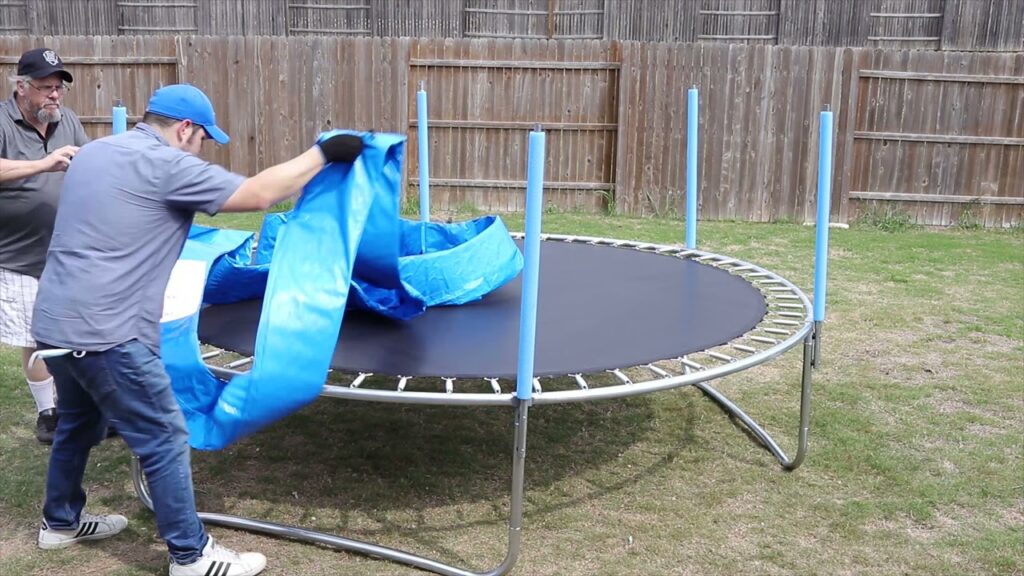
Step – 2
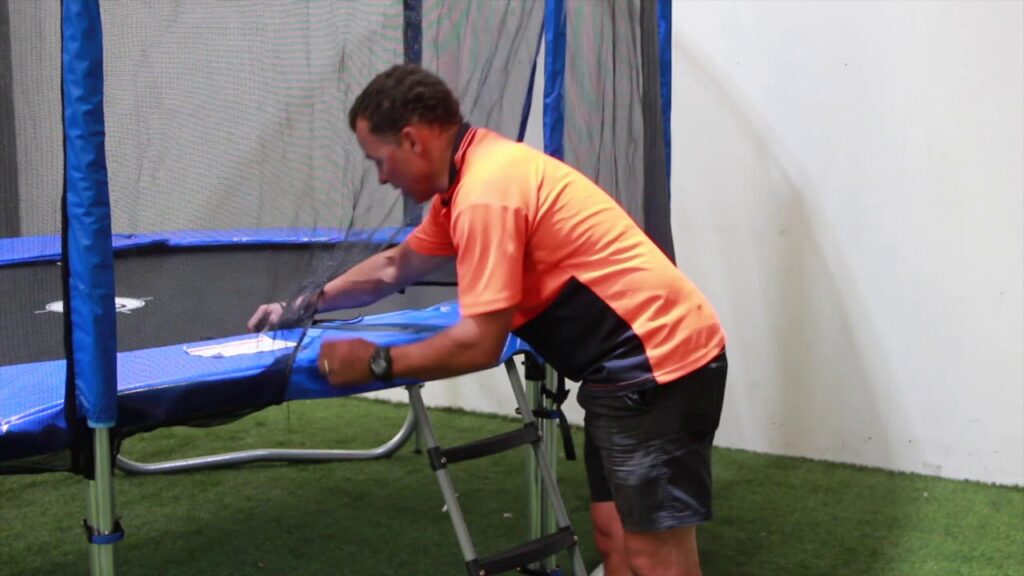
Once all the springs are installed, you can put on the spring pad. The purpose of the spring pad is to protect you if you happen to fall on the springs. And there’s no trick to setting it up. Simply lay it over the open springs and use the metal hooks, Velcro, bungee ropes or whatever comes with your trampoline to secure it properly.
Installing the Enclosure Net
After setting up the frame and jumping mat, you can already start using the trampoline. But there’s still the matter of installing the safety enclosure, and I strongly recommend finishing the entire installation before you use the trampoline.
The enclosure net serves as a barrier in case you lose your footing while jumping on the trampoline. It will protect you from falling out of the trampoline if you lose balance. So don’t overlook this part.
Not every trampoline comes with an enclosure net. So the first thing you’ll want to check is whether yours does. If there’s no included safety net, I suggest buying one from the market. A lot can happen on a trampoline, and an enclosure net minimizes the risk of accidents quite a bit. And you just can’t put a price on safety.
Here are the steps to putting together the enclosure net around your trampoline.
Step – 1
Start with attaching the bungee loops to the net first. For those that don’t know, the loops look like rubber bands, and they are responsible for keeping your net attached to the net posts when you bounce against it.
Step – 2
With the bungee ropes attached to the net, you can turn your attention toward the posts. Depending on the height of the enclosure posts, they might come in one or two pieces. If there are two pieces, you need to attach the two pieces together.
But you want to first start with the bottom piece and connect it to the O-ring of your trampoline. You might need to drill holes in the O-ring if your trampoline doesn’t come with pre-drilled holes. Once you find the holes, secure the post to the ring using screws and bolts.
Step – 3
Now that the post is securely locked, you can attach the bungee loops to the metal hooks on the post. But before you do that, it’s a good idea to install the foam sleeves on the poles.
Afterward, attach the bungee loops to the corresponding hooks, and you’re good to go.
Test Out Your Handiwork
While it might be tempting to let your kids jump on, I would recommend giving everything a quick go-over before you call the job finished. To check the trampoline, gently climb on and do a few small jumps. That way, even if the frame breaks down, you’ll be able to keep yourself safe.
If the trampoline feels unstable or wobbly, check over the frame parts and make sure everything is secured with screws and bolts. With off-brand, cheap trampolines, stability is a major concern. In that case, you might need to drill extra holes to make everything more stable.
Of course, if the surface where you put the trampoline is not stable, the trampoline will feel wobbly. That’s why it’s important to survey the installation spot beforehand to make sure the trampoline will be perfectly safe for your kids.
But if everything seems fine, the trampoline is ready to be used. It’s a good idea to anchor your trampoline now. An anchored trampoline will remain secure against strong winds or an over-enthusiastic jumper.
The Bottom Line
Setting up a new trampoline can seem like a daunting task at first, but when you get down to it, you’ll see that it’s actually pretty easy. It’s important to break things down into small bits first so that it feels more manageable. And most trampolines today come with a detailed instruction manual to make things easier for you.
And having a second set of hands helping you out is always good here. My dad used to bring me along when he would do the initial setup, and I often got to lend a helping hand every now and then too.
So, if you’ve got kids who’ll be using the trampoline, you could consider doing the same. It will work as a fun little bonding experience for the both of you, and by the time you’re done, you’ll both be itching to jump in together on the trampoline.
I hope my extensive guidelines on how to assemble a trampoline can help you put all the pieces together with minimal hassle. Good luck!
Hi, It’s Jason and Louise here and welcome to our website. We are parents to Hannah and Zachary who absolutely love the outdoors and are actually addicted to jumping on their trampoline. Our amazing little family lives on a beautiful 20-hectare rural property with Horses, Dogs, Cats, Chooks, a Rooster, Cats and also a Pet Kangaroo.