[7 Steps] How To Disassemble Trampoline: Tools & Guide
You may want to dismantle a trampoline for many reasons. For instance, I had to take down my Zupapa No-gap Design trampoline last year because of a freak storm. But for you, the purpose can be something else, whether it may be because you’re moving to a new place or simply don’t want it in your yard.
Anyways, it’s better to disassemble a trampoline on your own than to hire someone to do the job. Why waste the extra bucks if you can do it by yourself with the help of some instruction?

Taking apart a trampoline is not very difficult. Yes, it may seem a little tricky at first, especially if you have never done it. However, once you know how to disassemble a trampoline, then I believe anyone and everyone can dismantle a trampoline using a few household tools.
So, let’s not waste any more time and jump right into it.
Spring and Spring-free Trampoline Disassembly
As you already know, some trampolines come with springs, and some don’t. Their disassembly process is not the same. If you try to take down the latter with the methods used for the former, it won’t work. Actually, it won’t even make sense to you. So, make sure you know what you’re dealing with.
How to Disassemble a Trampoline with Springs
So, here is how you take apart a trampoline for storage or any other purpose. It shouldn’t take long if you know and can follow the steps accordingly.
Check How To Move Trampoline Without Taking It Apart
Tools Required
It’s best if you have a few tools by your side before you start dismantling a trampoline. Some of these items are more important than others, and it will become almost impossible for you to disassemble a trampoline without them, especially the big ones like a 16 ft trampoline.
- Electric Drill with Phillips Bit
An electric drill will be your best friend when you’re trying to take down a trampoline. It will save you a lot of time plus a lot of effort. I’m not saying that you can’t use a regular screwdriver but trust me, it’s going to pull the soul out of your life.
- Spring Pull Tool
Usually, high-end or top-tier trampolines come with spring tools to make the assembly or disassembly easier for the users. However, if you didn’t get one, then I would suggest you get a spring pull tool from your nearby hardware store.
It looks a bit like the letter’ T.’ It has two parts: a metal bar with a dull hook at the front and a handle. The former is about 5 inches, and the latter is about 4 inches long.
- 10mm Wrench
A trampoline comes with many parts, and most of them require a wrench set to remove. So, you should keep a spanner or 10mm wrench ready for disassembly. It will make things much easier for you.
- Gloves
It’s not necessarily that you need a pair of gloves to dismantle a trampoline, but it will make the process safer. So, I recommend wearing gloves to reduce or eliminate the risk of infecting your hands through rusty components.
Also, the springs might have some semi-sharp edges, which can scratch or cut your hands. So, it’s better not to risk it for the biscuit.
Check How to put trampoline together
- Other Tools
These items are not compulsory, but you can keep or use them for further convenience.
- Collapsible bags to store small parts of the trampoline
- Marker to label the bags or the small components
- Boxes to store the big parts
You can use the boxes you got with the trampoline or random boxes of the same size.
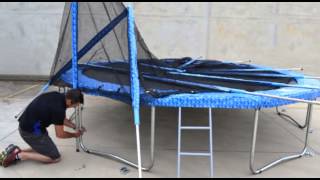
Disassembling the Trampoline
With the tools at the ready, it’s time to take apart the trampoline piece by piece.
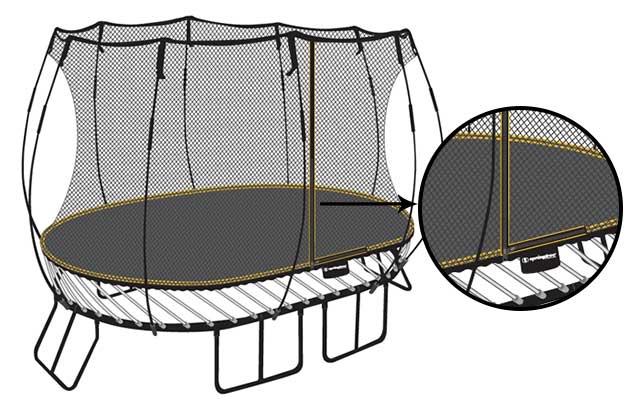
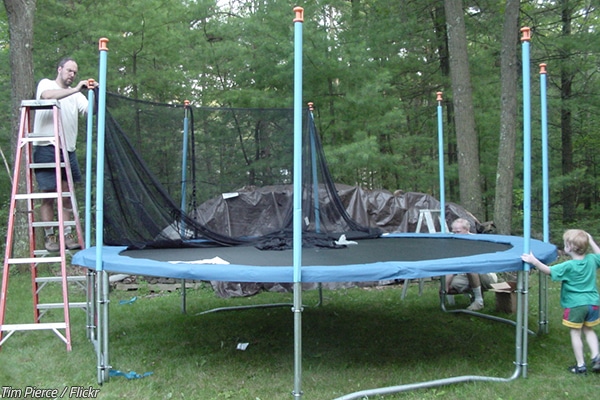
Step 1: Remove the Enclosure Poles
Your first task is going to be one of the following: take down the enclosure poles or remove the spring pad. It depends on the type of trampoline you own. Some trampolines have the spring pad inside the net, whereas others have it outside.
If your trampoline has the spring pad inside the net, then you’ll need to remove the poles first. The way these enclosure poles are attached to the frame is not the same on every trampoline. Fortunately, it’s easy to know how these rods are connected. You just need to go underneath the trampoline and take a peek.
More often than not, these safety poles are attached using screws and bolts. Remove them using your electric drill and wrench. Now, put them inside a labeled plastic bag, so you can easily assemble your trampoline in the future.
Some trampolines don’t use screws or bolts to hold the poles. If that’s the case, then try pulling them instead. Finally, trampolines like the BCANcome with snap buttons, which you can use to remove the poles in about a few seconds. All it needs is a press of a button.
Check Best 12ft trampoline
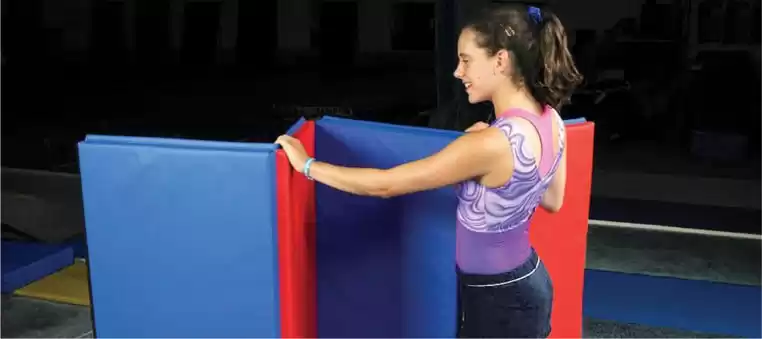
Step 2: Take Down the Safety Pad
Once you’re done removing the poles, it’s time to get rid of the safety pad. Keep the rods on the mat, as you won’t be able to put them in a box without removing them from the net.
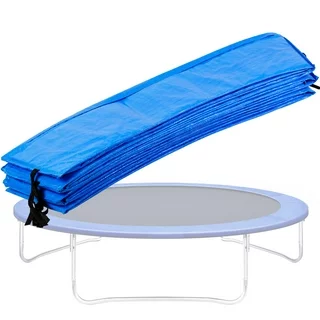
Usually, safety pads are locked in place using fasteners. Depending on your trampoline model, you will need to unhook or untie them. When it’s done, fold up the pad and put it aside.
Step 3: Separating the Poles from the Net
Now, it’s time to return to the poles on the mat. Not all trampolines have the same net style or a similar net attachment option.

So, you will need to figure out how the net is connected to the enclosure poles. It’s actually not that difficult, and you can know about the attachment option just by looking at the connection points. Most of the time, the net is attached to the poles using Phillips screws or 10 mm bolts. Sometimes it can be a strap combined with a clip.
Make sure to keep the hardware safe in a labeled bag after you remove the poles. You can also reattach them to the enclosure poles if you have the extra time or don’t feel like putting them in a bag.
Step 4: Take off the Net
Check your trampoline and see if removing the net without taking down the springs first is possible. If that’s the case, you should take off the net first, but if not, come back to step 4 after completing step 5.
It is usually very easy to remove the net from the trampoline. More often than not, it is attached using clips or straps to the triangular rings. Go underneath the trampoline and simply detach them.
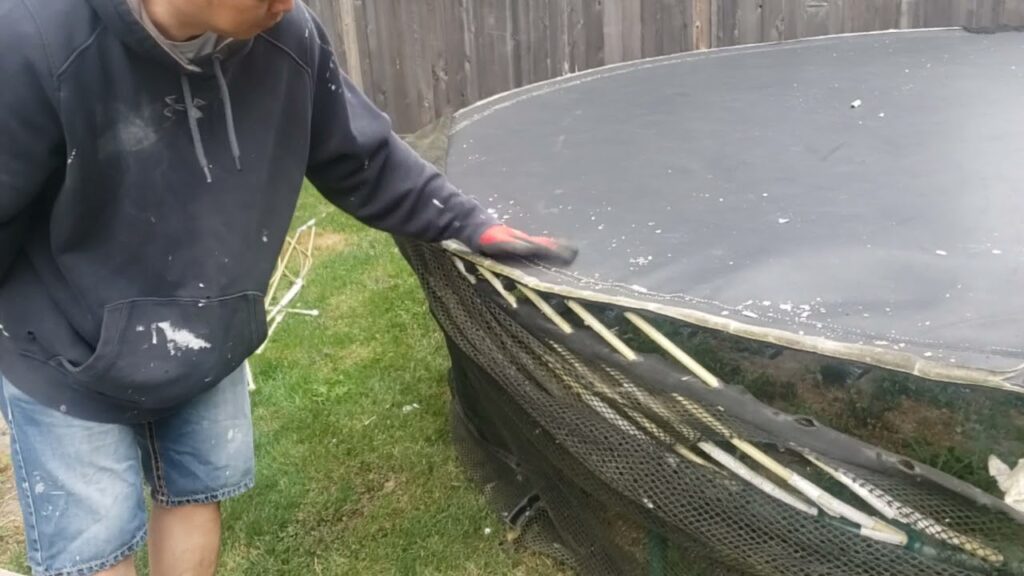
Step 5: Pulling the Springs
The next part is the trickiest and requires a lot of upper-body strength. Take out your spring pull tool because you’ll need it. Then, with the help of the instrument, pull the part of the spring attached to the frame.
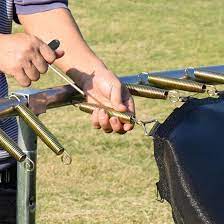
You will need to pull the spring hook in a slightly upward direction to detach it from the holes. Now, you can either remove the other end from the triangle hook and put it in the labeled bags or just let the spring hang from the mat.
It doesn’t matter which part of the trampoline you start from. However, removing all the springs from one side will cause the mat to fall on the ground and get dirty. So, it’s best to keep at least one spring connected on each side before removing them all. Having an extra pair of hands would help you immensely.
Tip: How about I let you in on a secret— If you’re unable to get your hands on a spring pull tool, there is a way you can still remove the hooks from the frame.
However, I should warn you that it will be more challenging than usual and require a lot more effort. You’re good to go if you have a spare spring with hooks on both sides. But, if you don’t have any, you’ll first need to remove a spring from the trampoline.
Grab a spring with your hand and pull it with all your strength. It should unhook the end stuck to the frame hole. Remove the other end from the triangle hook attached to the mat. Next, insert the front arc of the spring you’re using into the rear hook (the hook attached to the frame hole) of a random spring on the trampoline.
Now, use both hands (one hand on the spring you’re holding and the other on the spring connected to the trampoline) to unhook the spring from the frame.
Step 6: Folding the Mat
Once the springs are removed, the mat will automatically come off from the trampoline. Next, take the jump pad and fold it in half. If you’re using a round trampoline, the mat will have a 180-degree shape after the first fold.
It doesn’t matter what shape your trampoline features. Keep folding the jump pad till it’s in desirable shape. Set it aside or put it inside the box or a bag.
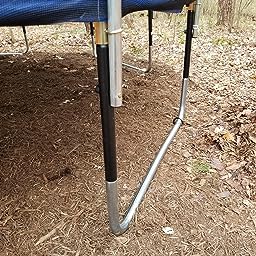
Step 7: Dismantle the Frame
So, we are down to the frame only. First, check if any screws or bolts are used to hold the legs to the top of the frame. If there are, remove them using your electric drill, wrench, or screwdriver.
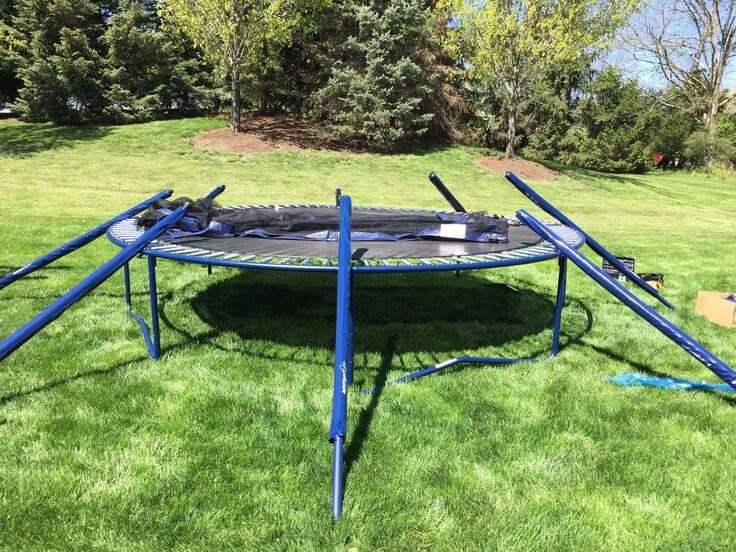
If you don’t see any bolts or screws, then you won’t need to use any tools. You can easily pull apart the components and separate the legs from the top frame. It shouldn’t be too difficult, but remember to sort the pieces correctly.
Keep the legs in one place and the upper frame in another. It should help you locate the components when you plan to reassemble the trampoline.
There you go, folks! This is how you disassemble a trampoline piece by piece.
How to Disassemble a Spring-free Trampoline
Dismantling a spring-free trampoline is probably easier than taking apart a regular trampoline. However, that’s just my opinion. You may feel differently.
Tools Required
Usually, when dealing with spring-free trampolines, it’s ideal to avoid power tool as it’s unnecessary and will only increase the chance of frame damage. So, these are all the things you will need:
- Wrench
- Allen key
- C-Clip (Included with the package)
Disassembling a Spring-free Trampoline
Disassembling a spring-free trampoline is easier than installing one. Usually, it takes two people to set it up, but if you are taking it apart, you won’t need any extra pair of hands. However, the job will become much easier if you can get assistance.
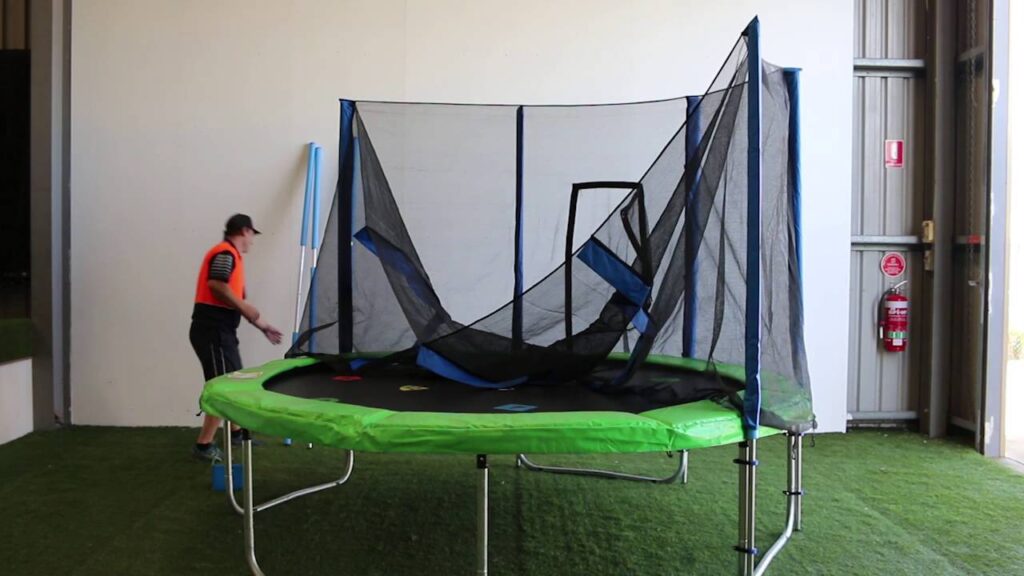
Step 1: Removing the Enclosure Poles
Okay, the first thing you’ll need to do is to take down the enclosure poles. It is a straightforward process. Turn the c-clips connected to the enclosure rod holder pockets. Once you remove the c-clip, you can pull the bottom of the rod from the hole.
Do this with all the poles till the net lies on the mat. Now, pull the top side of a rod to get it out from the net pocket. Continue doing this till every enclosure rod is detached from the net. Make sure to keep the poles together in one place. You can bend the enclosure rods by sliding the connector upwards. It will allow you to store them easily.
Step 2: Take Down the Mat
Pull the net down from the mat and keep it hanging under the frame. Next, it’s time to take down the jump pad.
You will need to use both hands for the next step. Push one of the rods with one of your hands and pull the mat upwards with the other. It should bring out the mat rod from the hole. Keep repeating the process till every single rod is out.
Step 3: Take off the Net
Afterward, you will have to take out the rods. It’s a piece of cake; you can do it by pulling them only. Remember that the rods go into the holes of the net and then into the small pockets on the frame.
So, you will need to pull out the rods from the pockets and the net holes. Removing all rods will cause the net to come off from the trampoline.
Step 4: Dismantling the Frame
If you look closely at the frame, you will see that bolts connect the top side to the legs. Use the wrench to remove the nut at the backside and the Allen key to unfasten the front side of the bolts.
Once you’re done removing the bolts, pull out the legs from the frame. Now, remove all the bolts that keep the entire top structure connected. It should break the frame into a few pieces.
With that said, you’re done. Now, why don’t you go ahead and give it a try?
FAQ
Here are the answers to some common questions about disassembling a trampoline.
How hard is it to dismantle a trampoline?
Honestly, it depends on the size, shape, and features of the trampoline. Also, some trampolines are easier to disassemble than others. For instance, if you’re dealing with agrade heavy-duty trampoline, it may require a lot of work and strength.
On the other hand, small yards trampoline shouldn’t be very difficult to dismantle because of its size.
How long does it take to dismantle a trampoline?
The time it takes to disassemble a trampoline is related to its size, shape, and type. For instance, dismantling a spring-free trampoline can take a few hours if you have no previous experience.
On the other hand, a regular 14 ft trampoline shouldn’t take you more than an hour to take down, even if you have never done it before.
Is it possible to disassemble a trampoline alone?
Yes, you can dismantle a trampoline on your own. However, it may take a lot out of you. Having an extra pair of hands makes the job a few times more convenient and faster.
What safety measures should I follow while disassembling a trampoline?
First, you should always wear safety gloves and goggles to protect your hands and eyes. You should ensure there are no bystanders except those who are there to help you.
If you have children or a pet, don’t let them near the trampoline during disassembly. Finally, remember to keep your head at a safe distance from the rods, as they tend to bounce back after removal.
How should I store the components of a trampoline?
You should keep a box to store the big parts and labeled bags to hold the small components like bolts, nuts, screws, or fasteners.
You can use bubble wrap or plastic to ensure the legs or frame don’t get dented. Also, keep the boxes and bags in a dry and clean place to prevent rust buildup.
In the End
The best way to preserve a trampoline or increase its lifespan is by storing it whenever the weather seems rough. Keeping your trampoline out in the open during a storm or heavy snowfall will surely cut its life expectancy by half or entirely.
On a different note, you can’t put a 14 ft, much less a 20 ft trampoline, on the back of a moving van. Your only option is to break it down into small pieces.
So, it doesn’t matter why you need to know how to disassemble a trampoline; what matters is whether you know it or not. I hope you found my instructions to be helpful and clear. So, the only thing left for me to say is—Good Luck!
Hi, It’s Jason and Louise here and welcome to our website. We are parents to Hannah and Zachary who absolutely love the outdoors and are actually addicted to jumping on their trampoline. Our amazing little family lives on a beautiful 20-hectare rural property with Horses, Dogs, Cats, Chooks, a Rooster, Cats and also a Pet Kangaroo.